Komplettlösung ( englisch )
![]()
| D - Spiele | Index | E - Spiele |
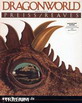
| Dragon World | |||
 |
Hersteller : | ||
| Genre : | Abenteuer | ||
| Jahr : | 1984 | ||
| Bewertung : | 56 % | ||
|
PART I
You are Amsel of Fandora, friend of the Last Dragon. Suddenly, you receive a message from the last dragon in the dragonpearl that he has been drugged and kidnapped by the Duke of Darkness and is being held in the Southland. You decide to obtain the assistance of the Monarch of Simbala, Hawkwind, another old friend. The journey will be long and hard. There are many ways of finishing the quest. Some puzzles have more than one solution and others need not be solved at all. This is but one possible solution. Remember that the arcade sequences are for your amusement or frustration and are not necessary to the quest!! You may find the picturesoff command useful in speeding up your quest. So you board your boat, untie it and set sail east toward Simbala. As you travel east you soon find your vessel destroyed and yourself beached on an island. Quickly you discover vines and logs which you tie together to make a raft. You also find dragonbane which will ward off those evil coldrakes! You board the raft and soon drift east to Simbala where you are beached. You head east where you find yourself in a dense forest. You keep heading east when you spot a windship overhead. Quickly gather the dry underbrush and start it on fire using your magnifying glass. The windship picks you up. As you wait you discover that the vessel is powered by jewels which burn when water is poured on them. You also learn that the dragonbane is placed outside the ship to keep away the coldrakes. Finally you arrive at the palace. You enter and are taken to a large chamber. While there, you talk to Hawkwind who agrees to help you. You also talk to Ephrion who gives you some valuable information. Then exit the room to the south and you will find yourself on the stairs. Hawkwind asks whether you wish to take the horses or the windship. Either will do. If you go up, board the windship and set off to the south. A coldrake approaches!! You put the dragonbane outside the ship and Hawkwind swerves to avoid the beast. Unfortunately, you crash. The ship is destroyed but you are both unhurt. You find the ship caught in a tree so you climb down and continue east on foot. The trail then leads south, southeast and finally east where you come to a fork. Avoid the swamp to the south with its dreaded swamp monster and head southeast to a north-south road. Keep going south until you find the road overgrown. There you see some rare tanna leaves which you gather up. The path continues to the southeast. You then follow the path south to the mine entrance. Enter the mine and take a torch. You head south but find a crying woman blocking your way. Comfort her and she gives you a wolf's tooth, the symbol of the thieves guild. You remember that Ephrion mentioned a book in the Kandesh library with a wolf's tooth! The woman slips away into the shadows, and you continue south only again finding your way blocked! This time by the Kuln. Fortunately, they are afraid of light and they let you pass when you wave the torch. Continue south where you find a pile of rock. Move the long flat one which reveals a tunnel and another cavern to the southeast. There you find a skeleton. You examine the skeleton and find a small key. Take the key and go up into a small cave. Follow the daylight to the south and you find yourself on an ancient road. To the south are the ruins of a villa. Go south to the ruins and then west to an old atrium. You see a tree sculpture with ancient amber treebears. You try to reach them but they are too high. Ask Hawkwind to help you and he lifts you up and you take one. Then go back to the road and keep going south to the gates of Kandesh. You see a large knocker and try to reach it. Again Hawkwind comes to your assistance and knocks for you. The guard eyes you suspiciously but lets you pass when you show him the tooth. You then enter the City of Kandesh and head south past the residential area to the plaza. Part II You find yourself in a large plaza, unsure of where to start. You notice the Garrison to the west which you decide would be best to avoid. Head northwest to the restaurant. You decide not to dine despite the hunger pangs and go south. You see the medicine man is selling an elixir which you decide may be useful in the future. Pay him the 40 talmas and go north and then southeast back to the plaza. Then go northeast to the music shop. You hear some strange music in the alcove and go northeast to investigate. You find a monkey playing sleep inducing music on the flute. He asks you to imitate his tune. Quickly and carefully play D S F A on the xylophone. The monkey is delighted and gives you his magical flute. Leave the alcove and head back southwest to the plaza. You remember Ephrion mentioning a book, so you head southwest to the library. You find the reading room door locked. Break the lock with your sword and enter. You find nothing much of interest so go west. Here You see a huge dazikar chomping on books!! Quickly head upstairs where the beast can't follow you. There you find the book with the wolf's tooth! Unlock it with your key. It tells you of a safe place under the city! Your excitement turns to fear when you realize you must get past the monster. Your mind races. You decide to give him a really good meal and take the encyclopedia and throw them at him. While he is hiding in his hole, quickly run down the stairs and out of the library the way you came in. You are back in the plaza. The music in the bazaar is alluring and you head southeast. You see a Rayan woman who for 5 talmas may tell you some very important information, then again she may only give you a flower. You decide not to visit the physician, the artist, the moneylender or the gaming house. The armorer you will save for another visit. If you decide to enter or leave Castle Doomhaven by the front entrance you will need an assassin's cowl which you can purchase from the tailor. In this walkthru a cowl is not needed. Go southeast to the tavern. You and Hawkwind sit down at the bar and order a drink. Pay the bartender, who gives you wine called Dragonsblood. Before you can drink it you find yourself injured and robbed in a brawl. Hawkwind carries you to the Physician's tent. You talk the physician into letting you owe him the 20 talmas and leave your dagger with him for insurance. Leave the tent to the south then go northwest back to the plaza. You decide to visit the Alchemist and go east to his shop. Ring the bell and he angrily answers saying his Philosopher's stone was stolen. He then throws a ring at you. You take the ring and see the word LAVA etched inside. You then examine the unused furnace and find you can enter it. You do and find a trapdoor which you leads you to a tunnel. You look around and see a very black stone which you take. Hawkwind tells you its the Philosopher's stone! Then go west into the thieves den. They look at you suspiciously and demand identification. Show the tooth and they greet you warmly. Leave to the west. You keep west until you find the thieves treasure trove. Take the talmas and the tuning fork and go upstairs. You find yourself in the Garrison's vault. Exit north into the plaza, and go southwest to the bazaar, then north to the physician and pay him the 20 talmas. He gratefully gives you back your dagger and some dragonscale as well! You leave to the south and reenter the bazaar. You go west to the armorer. You buy some rope and ask him about the starsword. You remember the Rayan woman saying "The blood of dragons will set the sword of dragons free". Pour the dragonsblood on the rock and take the starsword. The armorer asks for 100 talmas for the sword which you gladly pay him. You are warned that the sword can be used only once. You leave the armorer happily to the east and head northwest to the plaza. Part III Head south from the plaza to the Boulevard of Death, then west to the cemetery and south to the Cenotaph. With Hawkwind's help you move the marble door and enter finding a crypt with a crystal cover. You hit the tuning fork and the pure note moves the crystal, revealing stairs leading down. At the bottom of the stairs you find yourself in a north-south corridor beneath Castle Doomhaven. Go south and then up the stairs to the strong room. Take the jade key, the ivory and the plank and go back to the bottom of the stairs. Head north to the cistern and then east. You are at the edge of a pit. You place the plank across the pit and go to the eastern side. Continue east and you find yourself in front of a lead cell with Prince Alyn inside. You remember the Philosopher's stone! Touching the stone to the lead bars indeed turns them into soft gold that can easily be bent. You release Alyn and head southwest to the bottom of the stairs. Go north and up the stairs to the crypt. Exit the Cenotaph, go through the cemetery and east to the Boulevard of Death. You go north to the park and then southwest past the hedges to the palace. Enter the palace to the west. The guards recognize Prince Alyn they let you pass. Alyn brings you into Tormalion's chamber. Tormalion thanks you and asks you how he may help you. You ask him about Dragonmount. As you exit, he rewards you with a large diamond and the guards escort you out. You end up usually back at the park. You then decide to poke around the palace and go southwest past the hedges to the palace entrance and then north. You find a path and go west. The path continues west and south. You go south and find a large mosaic with treebears. One branch is empty. Place your amber treebear on it and a door opens. Enter and follow the hall south to the treasury. Open the door and enter. Inside you find a piece of ivory and take it. Then go north until you are again outside the palace on the path. Go north and then west to the dock. Enter and untie the boat and row west. You then see a sunken ship. You may examine the ship if you like but it's dangerous and the conch shell you find is of no use to the quest. Keep going west to the beach. Get out of your boat and go west. You find a rock with a piece of ivory in it. You pry it loose with your dagger but find that the crack is the mouth of a monster! In fact the island IS A MONSTER!! You remember from the Rayan woman that "music soothes the savage.....". Play your magic flute and the monster falls asleep. Take the ivory and run to your boat. Board the boat and row east back to the dock. Leave the boat and continue east until you reach the south path to the front of the palace and follow it south. From the front of the palace you go northwest past the hedges to the park. You then follow the road south to the southern gates fo Kandesh. PART FOUR Leave Kandesh and follow the road south. To the east you hear singing and go there to investigate. There you find a Rayan camp but something catches your eye to the south. It looks like a sail. You go south to the Rayan clearing and see a Simbalan windship. Climb up the rope to the ship. Pocket a few jewels and then pour water on the jewels in the brazier. The jewels start to burn and you take off to the west. You land at the base of dragonmount, again with your ship destroyed! Go west to the waterfall, Hawkwind suggests that you divert the river. You remember the jewels and throw them in the waterfall. An explosion occurs and reveals a cave to the south. As you enter the cave the walls covered with spikes begin to close on you. Quickly climb up the spikes and open the trapdoor. You go up into the middle of a volcano with molten lava in front of you. Suddenly, you remember the ring and throw it into the lava. The lava solidifies into rock and you make your way south to a beautiful door. The door unlocks easily with the jade key and you enter a mirrored room. A huge warrior threatens you. You are disoriented by all the mirrors so you begin to break them with your sword. As you do this, you notice that it is having the opposite effect on the guard. He is more disoriented! Finally, several exits will appear...but you still have to contend with the guard. You ask Hawkwind for help. When the guard is faced with fighting Hawkwind without the mirrors, he runs for his life!! Avoid the exit to the south since it goes to the maze. Go east into the room with the wheel. When you turn the wheel the room goes up and reveals a new room to the west which you enter. There you find some runes which Hawkwind helps you decipher. They give you a recipe for a captive's cure. Follow the insructions and place the elixir, dragonscale and tanna into the cauldron. Get the sticks and rub them to start a fire in the fireplace. Place the cauldron on the fire and take your cure when it is finished. Examining the room you discover a hook. Throw the rope up at it and climb up to the cupola. You see a pattern of a dragon carved in the crystal. After searching your possessions, you decide to try the ivory pieces. Insert the ivory pieces into the pattern which reveals a hidden doorway to the south. You enter and find yourself in a crater with a platform to the west. The Last Dragon is on the platform drugged and chained. Go to him. Cut the chain with the starsword and give him the cure. The dragon is back to himself again! Then the Duke of Darkness appears and threatens all of you. You remember then what Ephrion said to you and you say "Darkness fears the flame" The Last Dragon bursts forth with a huge flame and the Duke is defeated. You have suceeded in your quest and the Last Dragon is very grateful. ( Autor: Sewer Pom ) |
| D - Spiele | Index | E - Spiele |